Binder
Questions
Why sharing code alone may not be sufficient.
How to share a computational environment?
What is Binder?
How to binderize my Python repository?
How to publish my Python repository?
Objectives
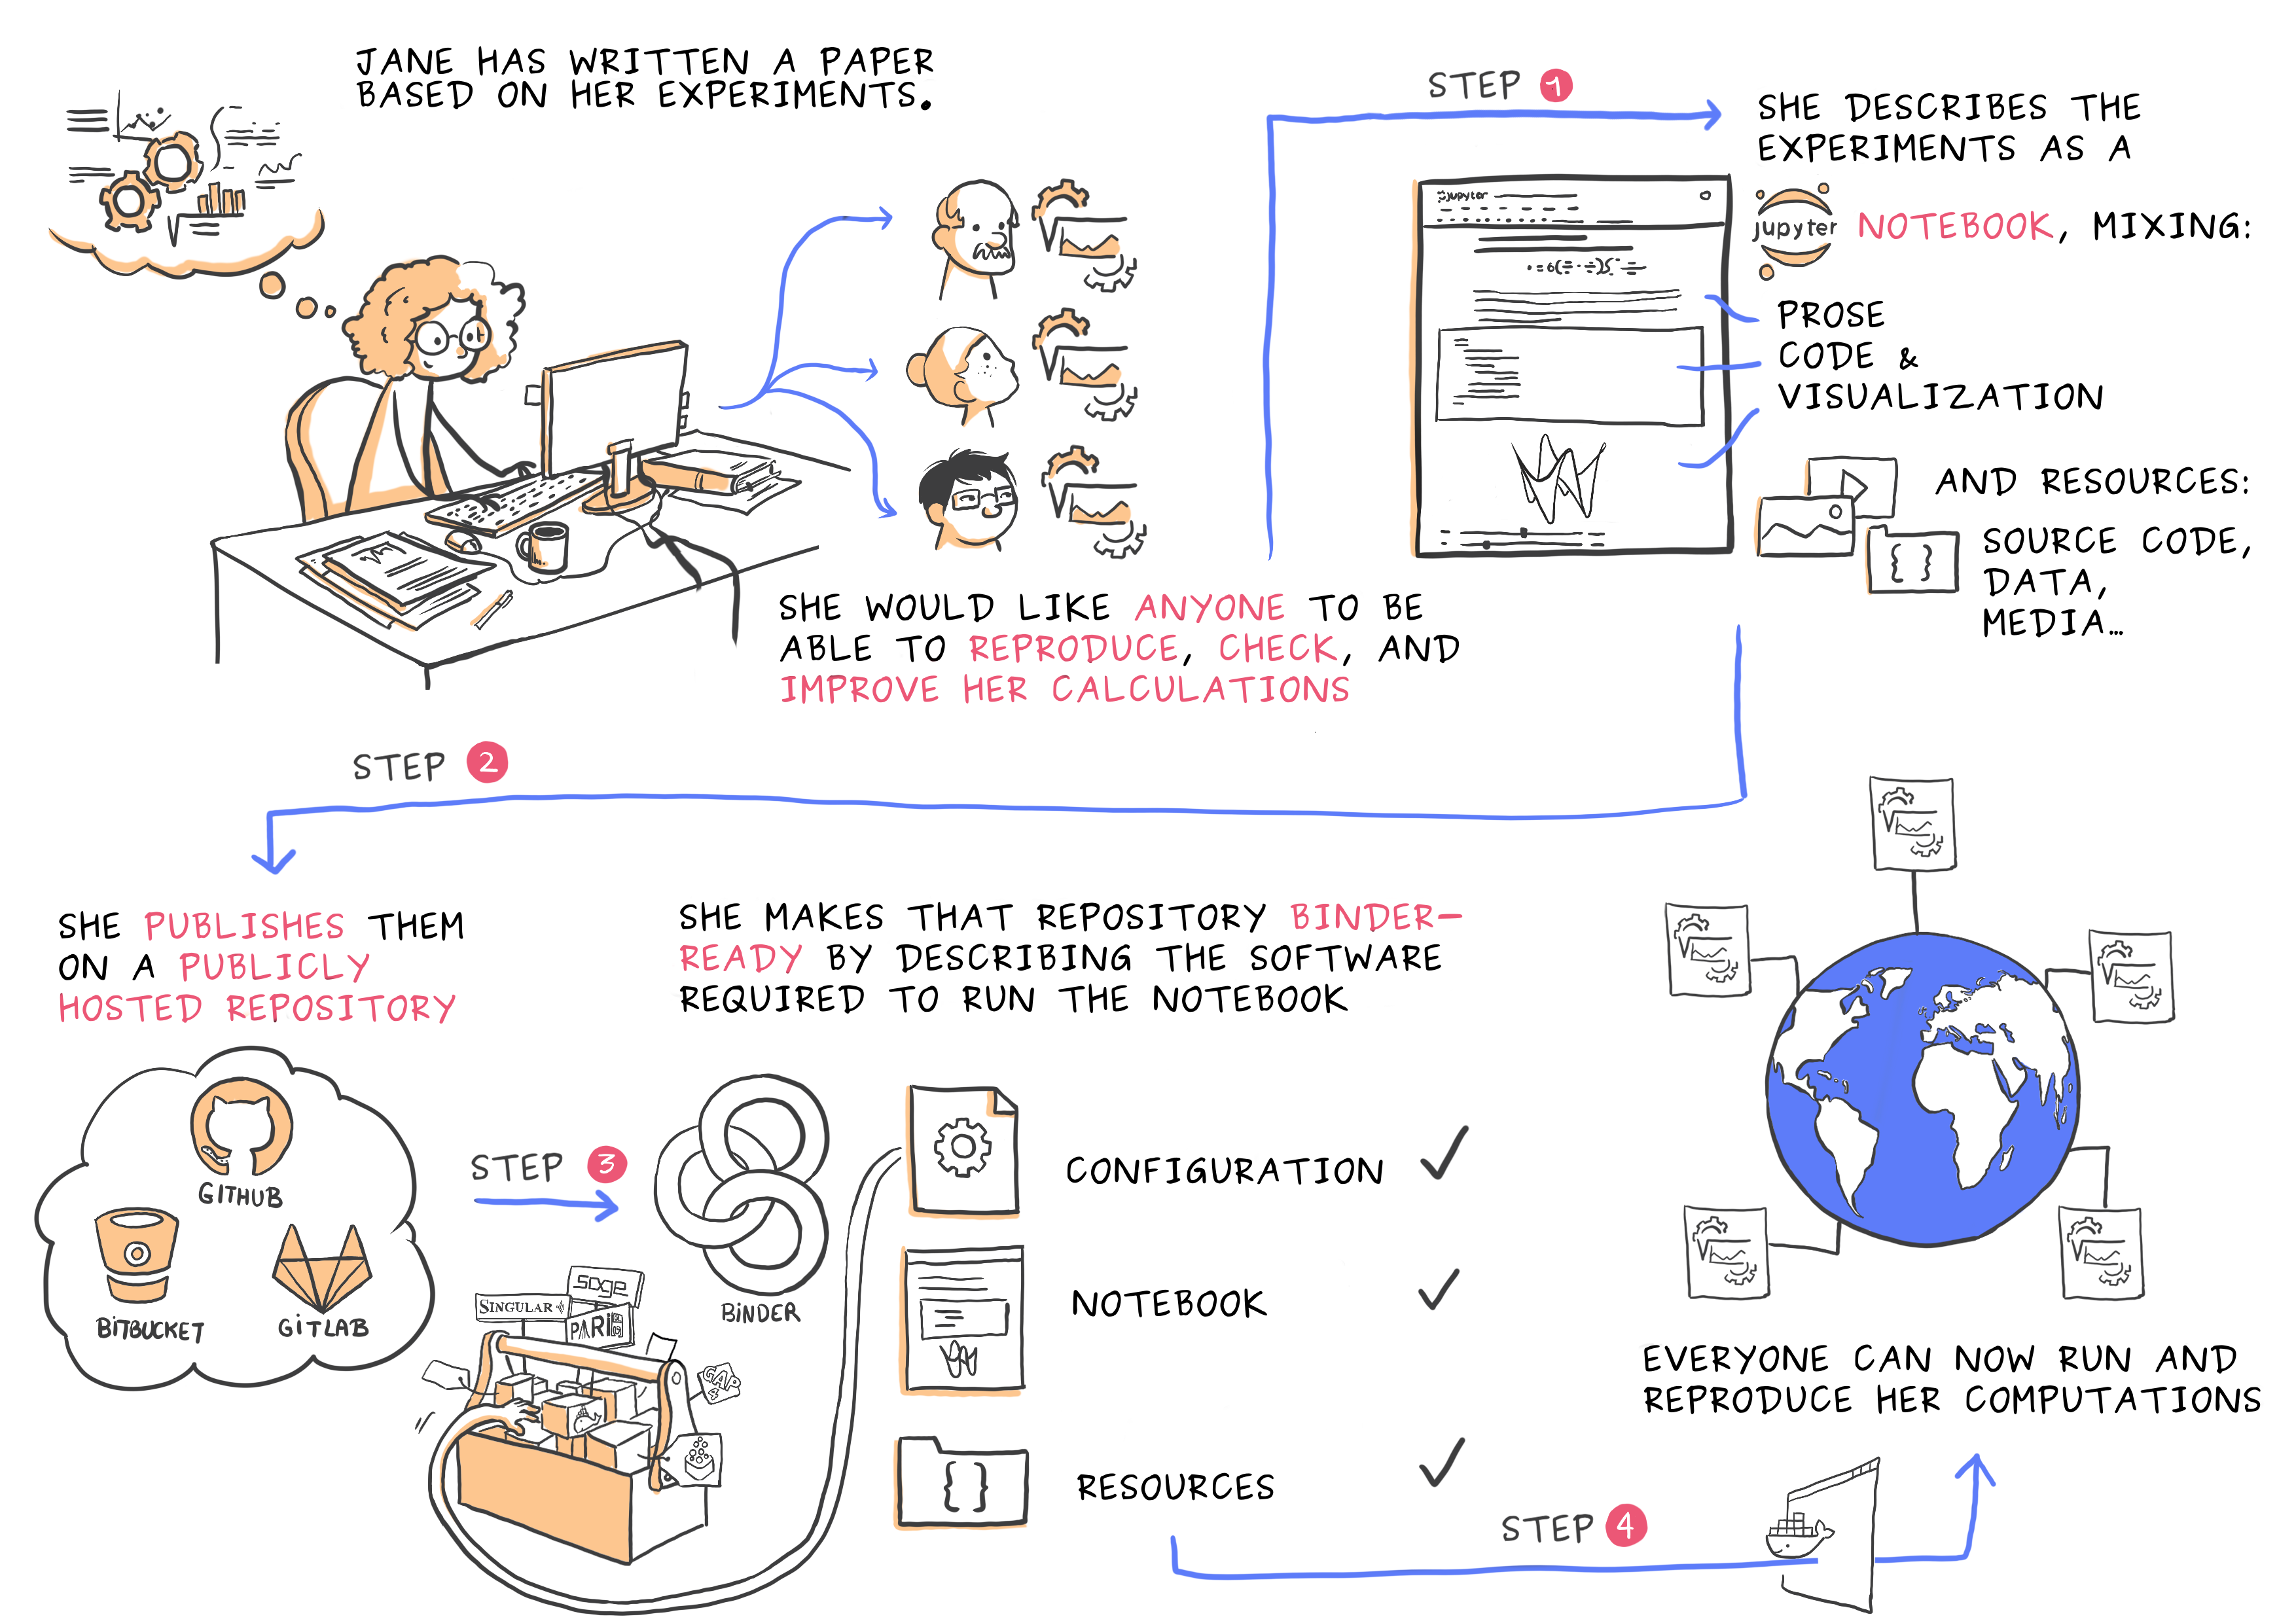
Learn about reproducible computational environments.
Learn to create and share custom computing environments with Binder.
Learn to get a DOI from Zenodo for a repository.
How can I get a DOI from Zenodo?
Zenodo is a general purpose open-access repository built and operated by CERN and OpenAIRE that allows researchers to archive and get a Digital Object Identifier (DOI) to data that they share.
Binder-3: Link a Github repository with Zenodo (optional)
Everything you deposit on Zenodo is meant to be kept (long-term archive). Therefore we recommend to practice with the Zenodo “sandbox” (practice/test area) instead: https://sandbox.zenodo.org
Link GitHub with Zenodo:
Go to https://sandbox.zenodo.org (or to https://zenodo.org for the real upload later, after practicing).
Log in to Zenodo with your GitHub account. Be aware that you may need to authorize Zenodo application (Zenodo will redirect you back to GitHub for Authorization).
Choose the repository webhooks options.
From the drop-down menu next to your email address at the top of the page, select GitHub.
You will be presented with a list of all your Github repositories.
Archiving a repo:
Select a repository you want to archive on Zenodo.
Toggle the “on” button next to the repository ou need to archive.
Click on the Repo that you want to reserve.
Click on Create release button at the top of the page. Zenodo will redirect you back to GitHub’s repo page to generate a release.
Trigger Zenodo to Archive your repository
Go to GitHub and create a release. Zenodo will automatically download a .zip-ball of each new release and register a DOI.
If this is the first release of your code then you should give it a version number of v1.0.0. Add description for your release then click the Publish release button.
Zenodo takes an archive of your GitHub repository each time you create a new Release.
To ensure that everything is working:
Go to https://zenodo.org/account/settings/github/ (or the corresponding sandbox at https://sandbox.zenodo.org/account/settings/github/), or the Upload page (https://zenodo.org/deposit), you will find your repo is listed.
Click on the repo, Zenodo will redirect you to a page that contains a DOI for your repo will the information that you added to the repo.
You can edit the archive on Zenodo and/or publish a new version of your software.
It is recommended that you add a description for your repo and fill in other metadata in the edit page. Instead of editing metadata manually, you can also add a
.zenodo.jsonor aCITATION.cfffile to your repo and Zenodo will infer the metadata from this file.Your code is now published on a Github public repository and archived on Zenodo.
Update the README file in your repository with the newly created zenodo badge.
Create a Binder link for your Zenodo DOI
Rather than specifying a GitHub repository when launching binder, you can instead use a Zenodo DOI.
Binder-4: Link Binder with Zenodo (10 min)
We will be using an existing Zenodo DOI 10.5281/zenodo.3886864 to start Binder:
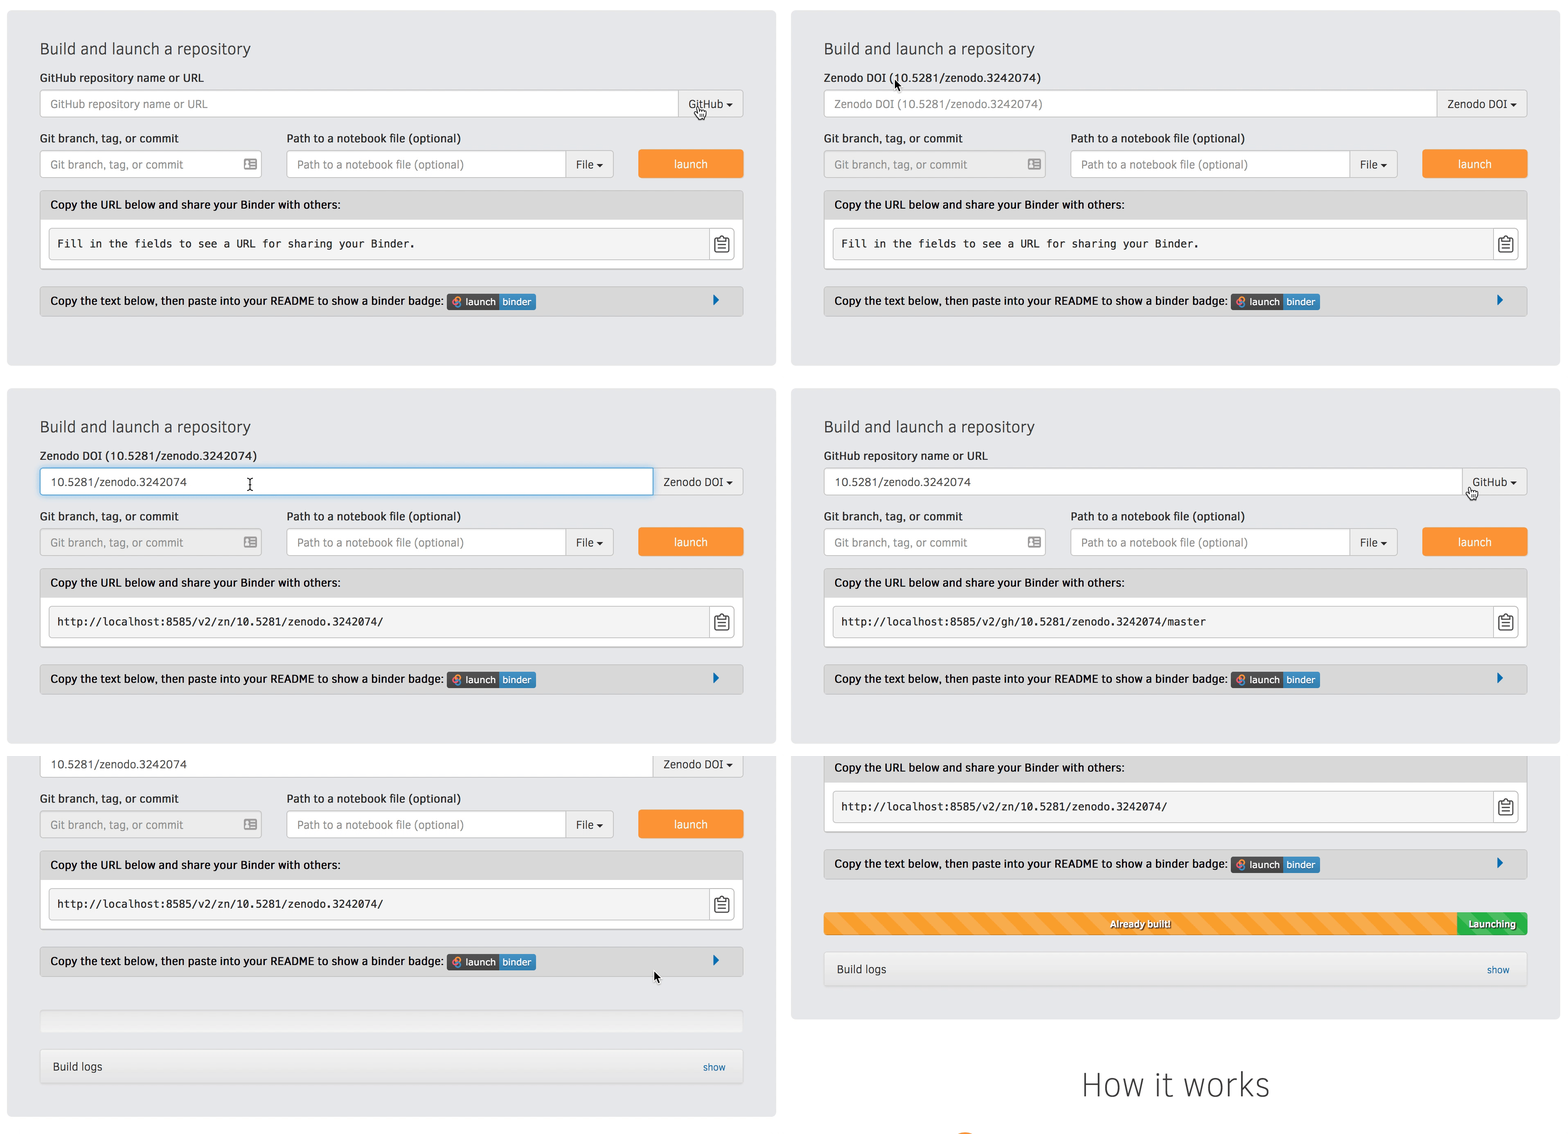
Go to https://mybinder.org and fill information using Zenodo DOI (as shown on the animation below):

You can also get a Binder badge and update the README file in the repository. It is good practice to add both the Zenodo badge and the corresponding Binder badge.
Keypoints
It is easy to sharing reproducible computational environments
Binder provides a way for anyone to test and run code - without you needing to set up a dedicated server for it.
Zenodo provides permanent archives and a DOI.


